Order Photo Prints

Madison

      Instead of paying for a hotel, after the concert, we stayed overnight at my grandparents' house in Madison, about an hour outside of Milwaukee. Since my dad and brother were going to a football game the next afternoon, us girls spent the day in downtown Madison shopping and eating before we drove home.

We went for a walk out onto a point that juts out into a lake and of course I took pictures.
And we got pizza at a place with tons of different, strange kinds of pizza. (Mac and cheese pizza, burger pizza, some kind of indian food pizza, salad pizza... But I decided on tomato, spinach and feta).
And you can't go to the University of Wisconsin Madison student union without getting some ice cream...
      And then we did a bit of shopping on state street, where my friend Grace (above) found three shirts and a pair of shorts for a total of $25 at the Gap! I also got an adorable collared dress from Urban Outfitters, but I don't have a picture of it... yet.
State Street
The inside view of the dome of Wisconsin's capital building. I love the pastels.
    On the drive back home, we stopped and went on a tiny hike to a scenic overlook and got to see all the pretty colors of the changing leaves.
      And, to top off the weekend... After leaving a nice little thank you comment on her instagram photo about the Milwaukee concert, Lorde's mom liked three of my instagram photos! (it was on my account @filozofia. I actually have three instagram accounts!)

Oh My Lorde // Milwaukee


      So, I've been on a longer-than-usual blogging break but that's because I had the most amazing weekend in Wisconsin! I, my sister, and two of our friends left school early on Friday so that we could make the six hour drive down to Milwaukee in time for the Lorde concert there! We were disappointed she didn't have a show scheduled in Minnesota but since my family is familiar with the Milwaukee area it wasn't too hard to convince my parents to let us get tickets.
      And the concert was agh-mazz-inggg. It was the first concert I had been to since Hilary Duff (anyone remember her?) In 2007 and it was a dream. It was awesome to hear Lorde sing live and it's just so cool when somebody famous whose music you listen to on repeat is right there before your eyes isn't it?
      I didn't want to risk bringing my camera in case cameras weren't allowed but I tried to get some okay photos of the concert on my phone. I used my camera the rest of the weekend though!

      Before the concert, orange soda + ice cream floats. (taken w/ camera)
      friends, across from the venue
Before the show, from our seats!
The sunset behind us
And a crappy iPhone shot of the queen herself!

Another post will be up soon of our day in madison after the concert. I hope your weekend was just as wonderful!

A Day at the Orchestra


      A couple of weekends ago, my friends and I went to an outdoor performance of the Minnesota Orchestra. For honors orchestra we are required to submit two concert reviews per semester so we decided to have fun and make an outing of it!
      The concert was free, so lots of people showed up and we we sat pretty far back, but it was fun nonetheless. It was really cool having a world-class orchestra performance outdoors and the weather was absolutely perfect!
      Of course being stupid, I didn't think to bring my zoom lens to photograph the orchestra and only had my 35mm, but I had plenty of fun taking pictures of our treats and things, and the lake behind the band-shell as well!

DIY Clay Necklace

     I've seen tons of these necklaces on instagram and they're super cute, but they're also super easy to make yourself, to save some money and have full creative control!

       You will need:

  • Polymer Clay (fimo, sculpey, etc) in your choice of colors
  • String or cord of adequate length
  • Toothpick or something similar to a toothpick
  • Oven (not pictured for obvious reasons)
  • An Imagination (;

      Step 1  Take your clay and knead it until it is soft. Mix any custom colors you want by combining colors and kneading the clay until they are completely blended. If you want a marbled effect, simply don't blend the colors as thoroughly.
       Step 2  Roll your clay blobs around in your hands like shown above. Add or remove clay to adjust the size and make sure the sizes of your beads are uniform (unless you don't want them to be!)
       Step 3  Pierce a hole through each clay ball with a toothpick. I suggest jiggling the toothpick around a bit to make sure the opening will be large enough for your string. 
       Step 4  Bake your clay beads according to the instructions on the package. Mine said to bake for 15 minutes per 1/4 inch (0.63cm) of thickness at 275 degrees Fahrenheit (135 degrees celsius), so I baked my beads for about 35min.
       Step 5  Wait for your beads to cool to a safe temperature after removing them from the oven. String them onto your cord, tie off the ends, and you've got a necklace!
       Do you like clay necklaces? I didn't at first but now I definitely do. I don't quite know how I feel about wearing it to school yet since they aren't popular at all in America, but I thought it would be lots of fun to make, and it was!


Mini Room Tour

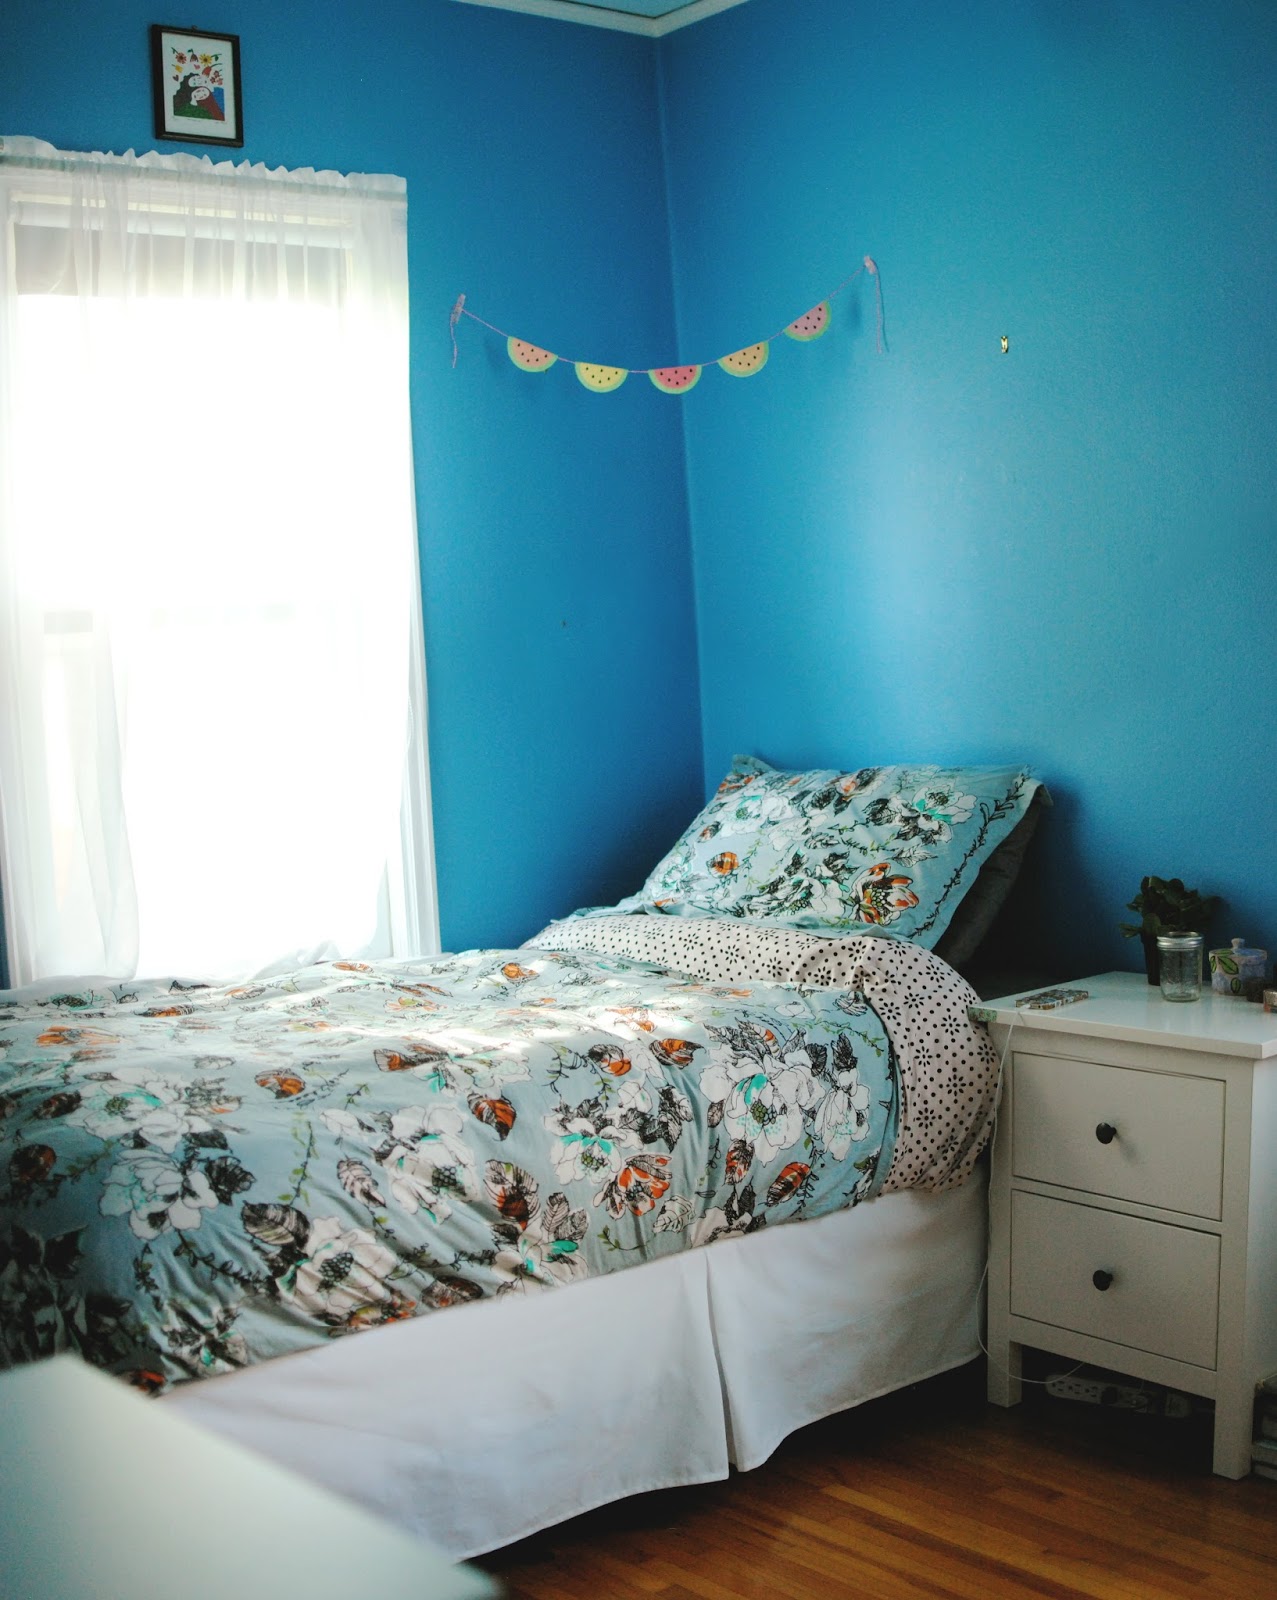
      Hey guys! I'm so happy I've been able to keep up with blogging the first few weeks of school. I'm really loving it! Now, my room definitely isn't in perfect shape at the moment. I'm planning on repainting the walls and redecorating them, too. This is probably my bedroom's most simplified state, if you forget about the pile of junk on the floor out of view of the camera of course. (We all do that, right?)
      Organization isn't really in my nature but I really appreciate it, so occasionally I'll do a big deep clean of my bedroom and hope my sister (I share a room) follows suit. Of course, once it was all nice and organized I had to take some photos to share! This isn't a full room tour- I need to fix some things before I can do that- but it's a nice look at the things around my sleeping area. 

      Here's a close-up look at my nightstand. I moved the ugly clock to another shelf so I could fill it up with my jade plant (which needs a pot asap!), some pretty boxes for jewelry, the new nail polishes from my recent wish list, and a peach body butter from the body shop. (my favorite! Fun fact: I bought it in Mississippi when we stopped at a mall in Jackson for lunch on the bus ride for our New Orleans trip so it has an extra special place in my heart because I loved the trip so much).
      Here's the top drawer of my nightstand (from ikea). It has this nifty little tray thingie for all the little bits that I want to toss in without worrying to much about them getting lost. Today, it's filled with:
  • My swatch watch from Paris
  • A Kimmidoll keychain
  • Old state fair tickets I never used 
  • An old metro ticket from Paris
  • My seam ripper (I always lose it!)
  • Coins from Europe and Iceland
  • My Guatemalan self-embroidered coin purse
  • My pathetic washi tape collection

      And here's the whole thing, complete with the watermelon garland from my last post! (My duvet/doona cover is from Urban Outfitters, online only) 

     Any print/poster recommendations to spruce up my wall?

DIY Watermelon Garland + FREE PRINTABLES


      With summer coming to a close here, I thought I should be able to squeeze in another last bit of fun and warmth, so I made this cute little garland! (Although yours doesn't have to be little!)
    This post is inspired by Chloe from A Little Birdy Blog's DIY Scallop Garland, but I thought I'd add my own twist, plus give you a little freebie, which comes in 5 different color varieties, since watermelons do come in many different colors! (I used the multi-colored version for this DIY).
     And excuse the grainy pictures, I used my iPhone since I've neglected to charge my camera. 

you will need: 
  • string (I braided embroidery thread since I don't have good string at home)
  • scissors
  • glue stick
  • free printable, or several of them! (see bottom of post)

      First, cut out each circle. Make sure to cut out the entire thing and not just the colored part since you'll need the blank half too! I just made the template one-sided since printer ink is quite expensive and it's best to use as little as possible. 

      Next, fold all your circles in half, like above.

      Last, take your glue stick, rub it on one of the inside halves of the watermelon, like above, and fold it closed on the string! Repeat for any remaining watermelons. 

here are your free templates! just click on any of the images to download them.

     You could make one with just five watermelons, or you could make a really long one with multiple printables! And of course, combine all the colors any way you'd like!

     Happy garland-making! if you'd like me to make the printable in any other colors, or a double-sided version, just leave a comment and I'd be happy to!

     If you make one of these and post about it anywhere, comment a link! I would love to see it!


Fairly Wonderful


      This post is pretty late, but I figured I'd post it once school started to remind myself of how nice and summery the day ways, because, quite happily, I did end up getting back to the state fair on its last day! I decided to do some outfit pictures, since time was running out for shorts and sleeveless shirts! (Thanks to my mom for the photos!) But of course we couldn't go back without getting some food (more specifically, cheese curds and cookies. Yummmmmm!)


shirt// brand unknown (purchased at a boutique in Newport, RI)
shorts// vintage Levi's
sunglasses// Forever21
bag// Guatemala (★^O^★) I grew up with lots of Guatemalan stuff around the house since my grandma used to live there half the year and would bring tons of souvenirs to family.